
 Save
Save
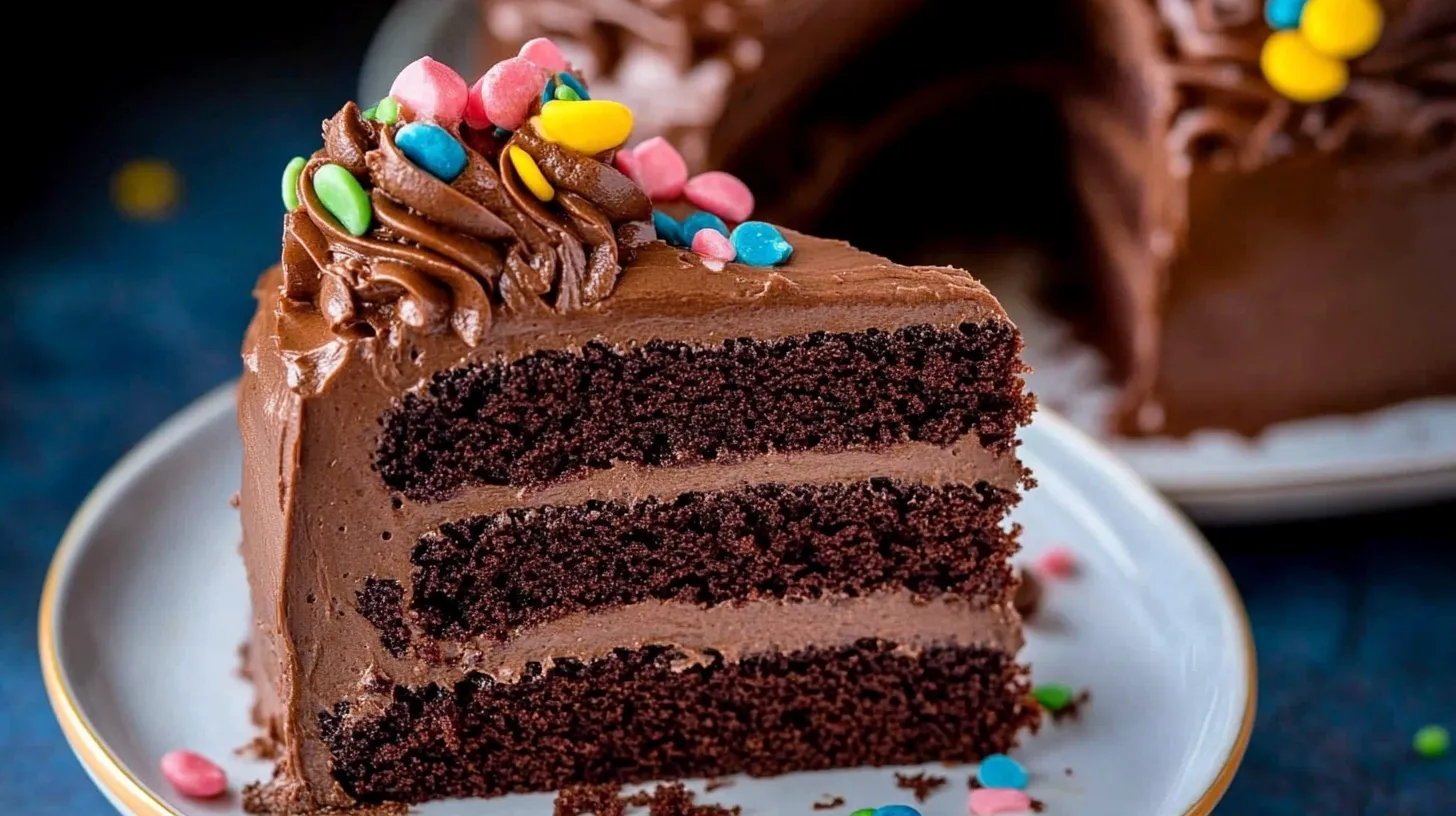
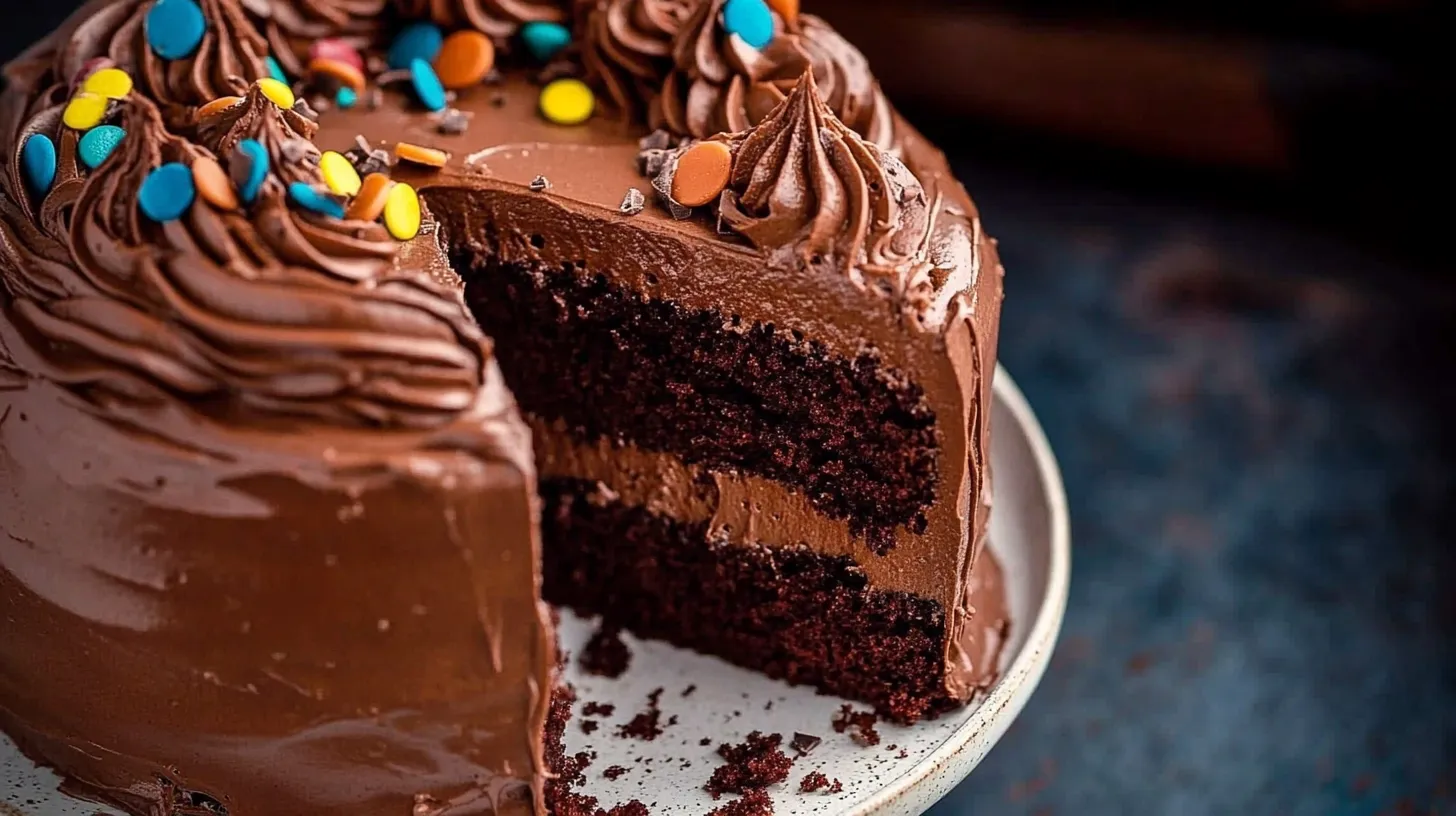
This rich, moist, and deeply chocolatey cake is exactly what you need when chocolate cravings strike. Topped with smooth chocolate frosting and colorful candies, it creates an irresistible dessert perfect for any celebration or simply treating yourself to something special.
I first made this cake for my daughter's birthday party last year, and it was such a hit that it's become our go-to celebration cake. Even my husband, who usually prefers fruit desserts, requests this chocolate masterpiece regularly.
Ingredients
- All purpose flour provides the perfect structure without making the cake too dense
- Granulated sugar balances the cocoa's bitterness while keeping the cake moist
- Unsweetened cocoa powder delivers that rich chocolate flavor look for Dutch process for extra depth
- Baking powder and baking soda work together to create the perfect rise and texture
- Eggs bind everything together and add richness
- Whole milk adds moisture and creates a tender crumb
- Vegetable oil keeps the cake incredibly moist even days after baking
- Vanilla extract enhances the chocolate flavor without overwhelming it
- Hot coffee optional but recommended as it intensifies the chocolate flavor without adding coffee taste
- Unsalted butter for the frosting creates a silky smooth base choose high quality for best results
- Powdered sugar gives the frosting structure and sweetness
- Heavy cream creates that luscious mouthfeel in the frosting
Step-by-Step Instructions
- Prepare the Pans
- Preheat your oven to 350°F and thoroughly grease three 8-inch round cake pans. I like to line the bottoms with parchment paper too for easy release. Nothing is more heartbreaking than a cake that sticks to the pan after all your hard work.
- Mix Dry Ingredients
- In a large bowl, whisk together the flour, sugar, cocoa powder, baking powder, baking soda, and salt until well combined. This ensures even distribution of leavening agents for a perfectly textured cake. Take extra time here to break up any cocoa lumps.
- Add Wet Ingredients
- Add the eggs, milk, oil, and vanilla to your dry mixture. Beat on medium speed for about 2 minutes until the batter becomes smooth and well combined. The batter will seem thick at this point, but that changes in the next step.
- Incorporate Hot Liquid
- Carefully pour in the boiling water or hot coffee while mixing on low speed. The batter will transform before your eyes, becoming thinner but silky smooth. This hot liquid blooms the cocoa powder, intensifying the chocolate flavor dramatically.
- Bake the Cakes
- Divide the batter evenly between your prepared pans. I use a kitchen scale to ensure each layer is exactly the same size. Bake for 30–35 minutes, or until a toothpick inserted into the center comes out clean with a few moist crumbs.
- Cool Completely
- Allow the cakes to cool in the pans for exactly 10 minutes before turning them out onto a wire rack. Too soon and they might break, too long and they could stick. Let them cool completely before frosting, at least 2 hours.
- Make the Frosting
- Beat the softened butter until light and fluffy, about 3-4 minutes. This creates the base for your silky frosting. Gradually add the sifted powdered sugar and cocoa powder, beating slowly until fully incorporated. Add the salt, vanilla, and cream, then beat on high speed until the frosting becomes fluffy and spreadable.
- Assemble and Decorate
- Place your first cake layer on a serving plate and spread a generous layer of frosting on top. Add the second layer and repeat. Finally, add the third layer and frost the entire cake, creating swirls and patterns if desired. Decorate with colorful candies on top for a festive touch.
 Save
Save
My favorite part of making this cake is watching people's faces light up when they take their first bite. My son once declared it was "better than any bakery cake" which might be the highest compliment I've ever received!
Storage Instructions
This chocolate cake maintains its moisture beautifully when stored properly. Keep it covered at room temperature for up to two days, making sure your cake dome or container doesn't touch the frosting. For longer storage, refrigerate in an airtight container for up to five days, but always let it come to room temperature before serving for the best texture and flavor. The cold dulls the chocolate notes, so patience is key here.
Make-Ahead Options
I've learned that this cake actually tastes even better the day after baking, as the flavors have time to develop and meld together. You can bake the cake layers up to three days in advance, wrap them tightly in plastic wrap once completely cool, and store at room temperature. The frosting can be made a day ahead and refrigerated - just bring it to room temperature and give it a quick whip before using. This makes it perfect for busy celebrations when you need to spread out your preparation.
Serving Suggestions
This chocolate cake pairs beautifully with so many accompaniments. For an elegant dessert, serve with fresh raspberries or strawberries on the side to cut through the richness. A scoop of vanilla bean ice cream creates a perfect hot-and-cold contrast that my family adores. For coffee lovers, a shot of espresso alongside creates a sophisticated pairing that enhances the chocolate notes. During the holidays, I like to add a sprinkle of crushed peppermint candies on top for a festive touch.
The Secret to Moisture
The combination of oil instead of butter in the cake batter and the addition of hot liquid are the two magic elements that create this cake's legendary moisture. Oil coats the flour proteins better than melted butter, preventing too much gluten development which keeps the cake tender. Meanwhile, the hot coffee or water helps bloom the cocoa powder, releasing its full flavor while also creating a uniquely silky batter. I discovered this technique years ago and have never looked back – it's transformed all my chocolate baking!
 Save
Save
Recipe FAQs
- → What makes this chocolate cake so moist?
The exceptional moisture comes from the combination of vegetable oil instead of butter, plus the addition of hot coffee or boiling water. The hot liquid helps bloom the cocoa powder, releasing more flavor while creating a more tender crumb structure.
- → Can I make this cake without coffee?
Absolutely! While coffee enhances the chocolate flavor without adding coffee taste, you can substitute with the same amount of boiling water and still achieve excellent results.
- → How far in advance can I make this cake?
You can bake the layers up to 2 days ahead and store them wrapped tightly at room temperature. The frosted cake keeps well for up to 5 days refrigerated. For longer storage, freeze unfrosted layers for up to 2 months.
- → Can I turn this into cupcakes instead?
Yes! This batter works perfectly for cupcakes. Fill liners about 2/3 full and bake at 350°F (175°C) for 18-20 minutes or until a toothpick inserted comes out clean. This recipe yields approximately 24 cupcakes.
- → Why is my cake batter so thin?
The thin batter is completely normal and intentional! The liquid-to-dry ingredient ratio creates that signature moist texture and tender crumb. Trust the process—it will bake up perfectly.
- → What's the best way to ensure even cake layers?
For perfectly even layers, use a kitchen scale to divide the batter equally between pans. You can also use cake strips around the pans to promote even baking and prevent doming.