
 Save
Save
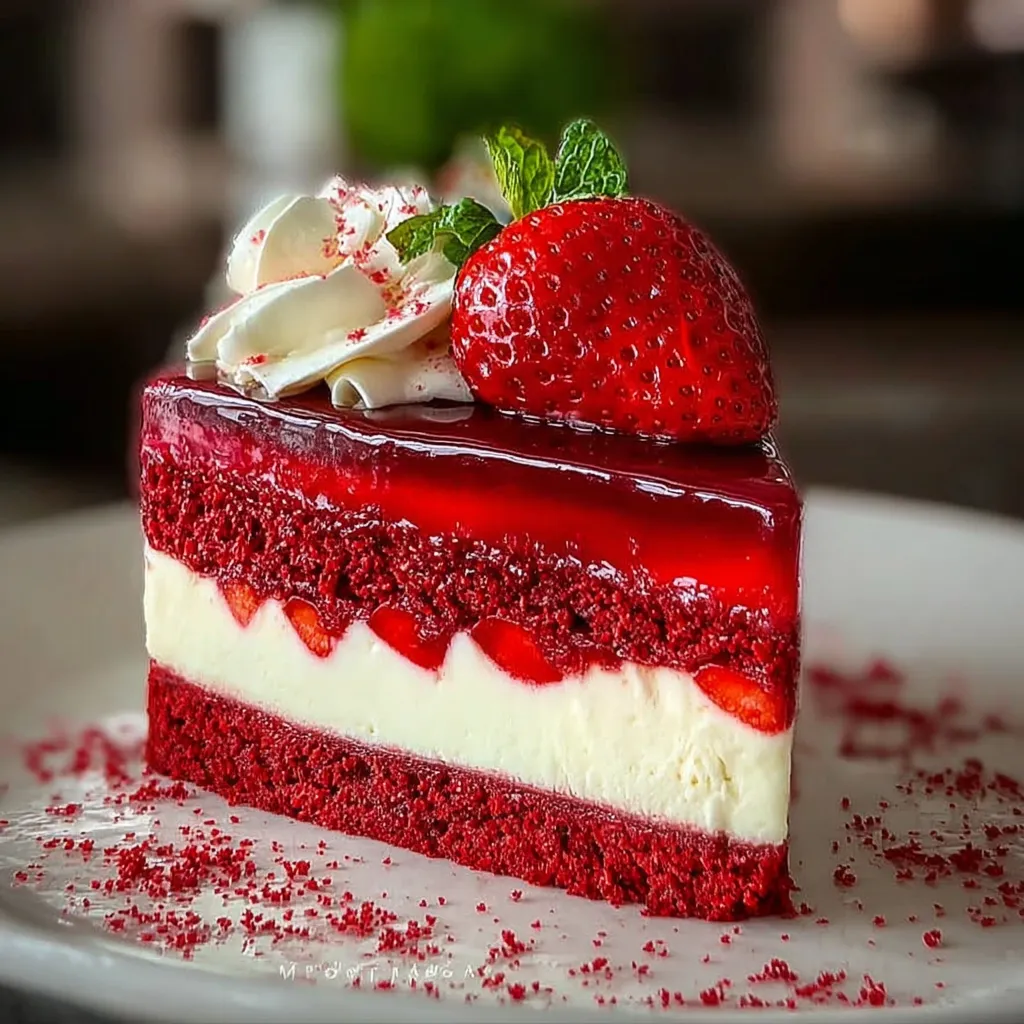
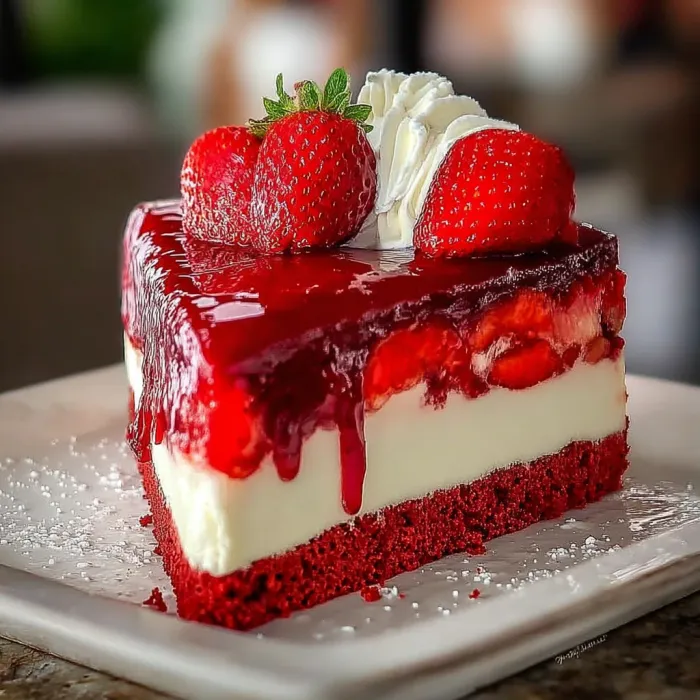
This showstopping dessert marries the classic charm of red velvet cake with the creamy richness of cheesecake all crowned with a cascade of fresh strawberries. It is perfect for special occasions or when you want to share something unforgettable with friends and family.
I made this for my anniversary last year and my husband could not believe I baked it at home. Now he asks for it at every family celebration
Ingredients
- All purpose flour: gives the red velvet base a tender crumb Use a fresh bag for best texture
- Unsweetened cocoa powder: ensures real chocolate flavor Dutch process lends the deepest color
- Baking soda: for even lift Be sure your box is still active for a light cake
- Salt: sharpens the flavors Fine sea salt blends more evenly into the batter
- Buttermilk: brings unmistakable tang and moisture Look for full fat or make your own with lemon juice and milk
- Vanilla extract: perfumes both layers Pure vanilla is always best for depth
- Vegetable oil: keeps the cake moist even after chilling Choose a neutral oil for clean flavor
- Granulated sugar: sweetens and helps with structure Use extra fine if available for better mixing
- Egg: makes the cake fluffy and builds structure Use room temperature eggs for the smoothest batter
- Cream cheese: stars in the cheesecake layer Full fat blocks create the richest texture Let it soften completely to prevent lumps
- Sour cream: adds silkiness and a gentle tang Only real cultured sour cream will give you the right flavor
- Fresh strawberries: for topping Pick berries that are bright red with no white tips for fullest taste
- Whipped cream: to garnish Opt for freshly whipped cream for pure taste and volume
Step-by-Step Instructions
- Mix the Dry Ingredients:
- Combine flour cocoa powder baking soda and salt in a large bowl Stir thoroughly and press out any lumps for a fine even crumb in the red velvet layer
- Blend the Wet Ingredients:
- In a separate bowl whisk buttermilk vanilla extract vegetable oil granulated sugar and one egg Mix just until homogeneous and glossy for a smooth batter
- Combine to Make the Batter:
- Gradually fold the dry ingredients into the wet using a spatula Mix until you see no dry streaks Do not overmix pour into the greased springform pan and level with an offset spatula
- Prepare the Cheesecake Layer:
- Beat cream cheese in a clean bowl on medium speed until completely smooth and no lumps remain Scrape down the sides For the best texture do not rush this step
- Sweeten and Enrich:
- Add granulated sugar and keep beating until the mixture looks light and creamy Crack in eggs one at a time mixing just until blended after each then blend in vanilla extract and sour cream
- Assemble for Baking:
- Slowly pour the cheesecake batter over the red velvet cake layer Pour close to the surface so layers stay separate Use the back of a spoon to gently spread evenly
- Bake to Perfection:
- Bake in preheated oven for 50 to 60 minutes The edges should look set while the center jiggles slightly Turn off the oven and crack the door Leave the cake inside for one hour for smoother texture
- Chill and Finish:
- Transfer cake to the fridge for at least four hours or overnight for best slicing Run a knife around the edge before unmolding Top with strawberries and generous swirls of whipped cream before serving
 Save
Save
Fresh strawberries on top remind me of the birthday party when my daughter tried to sneak off with the topping bowl Her giggles made this cake a true family favorite
Storage Tips
Store leftover cheesecake tightly covered in the fridge to keep it tasting fresh The flavors deepen by day two and the cake remains soft for up to four days If you like to prep ahead this cake even freezes well without the berry topping Wrap slices individually for easy treats
Ingredient Substitutions
Swap buttermilk with milk plus a splash of vinegar if needed Use Greek yogurt instead of sour cream for a slightly thicker cheesecake layer Try using raspberries or blueberries if strawberries are out of season or substitute chocolate shavings for garnish
Serving Suggestions
Cut with a hot knife for impressively neat slices I love serving thick pieces with extra berries on the side This recipe is always a hit at baby showers holidays or Valentine dessert spreads Add a glass of sparkling rosé for a truly festive plate
Red Velvet’s History
Red velvet became iconic in American bakeries in the early 1900s Its signature color originally came from the reaction of cocoa with acidic buttermilk Modern recipes boost that vibrancy with cocoa and food coloring though this cake naturally gets a hint of red from quality cocoa powder
Recipe FAQs
- → How do I achieve a moist red velvet base?
Use buttermilk and oil for tenderness, and avoid overbaking to ensure the layer stays soft and moist.
- → What is the key to a smooth cheesecake layer?
Soften cream cheese fully before mixing and incorporate eggs one at a time for a creamy, lump-free batter.
- → Can I use frozen strawberries for the topping?
Fresh strawberries are best for texture and flavor, but thawed and drained frozen berries can be used if needed.
- → How should the cheesecake be chilled?
Let it cool in the oven first, then refrigerate for at least four hours, preferably overnight, to set completely.
- → Do I need to use a springform pan?
A springform pan makes unmolding neater and easier, preserving the dessert's distinct layers and shape.